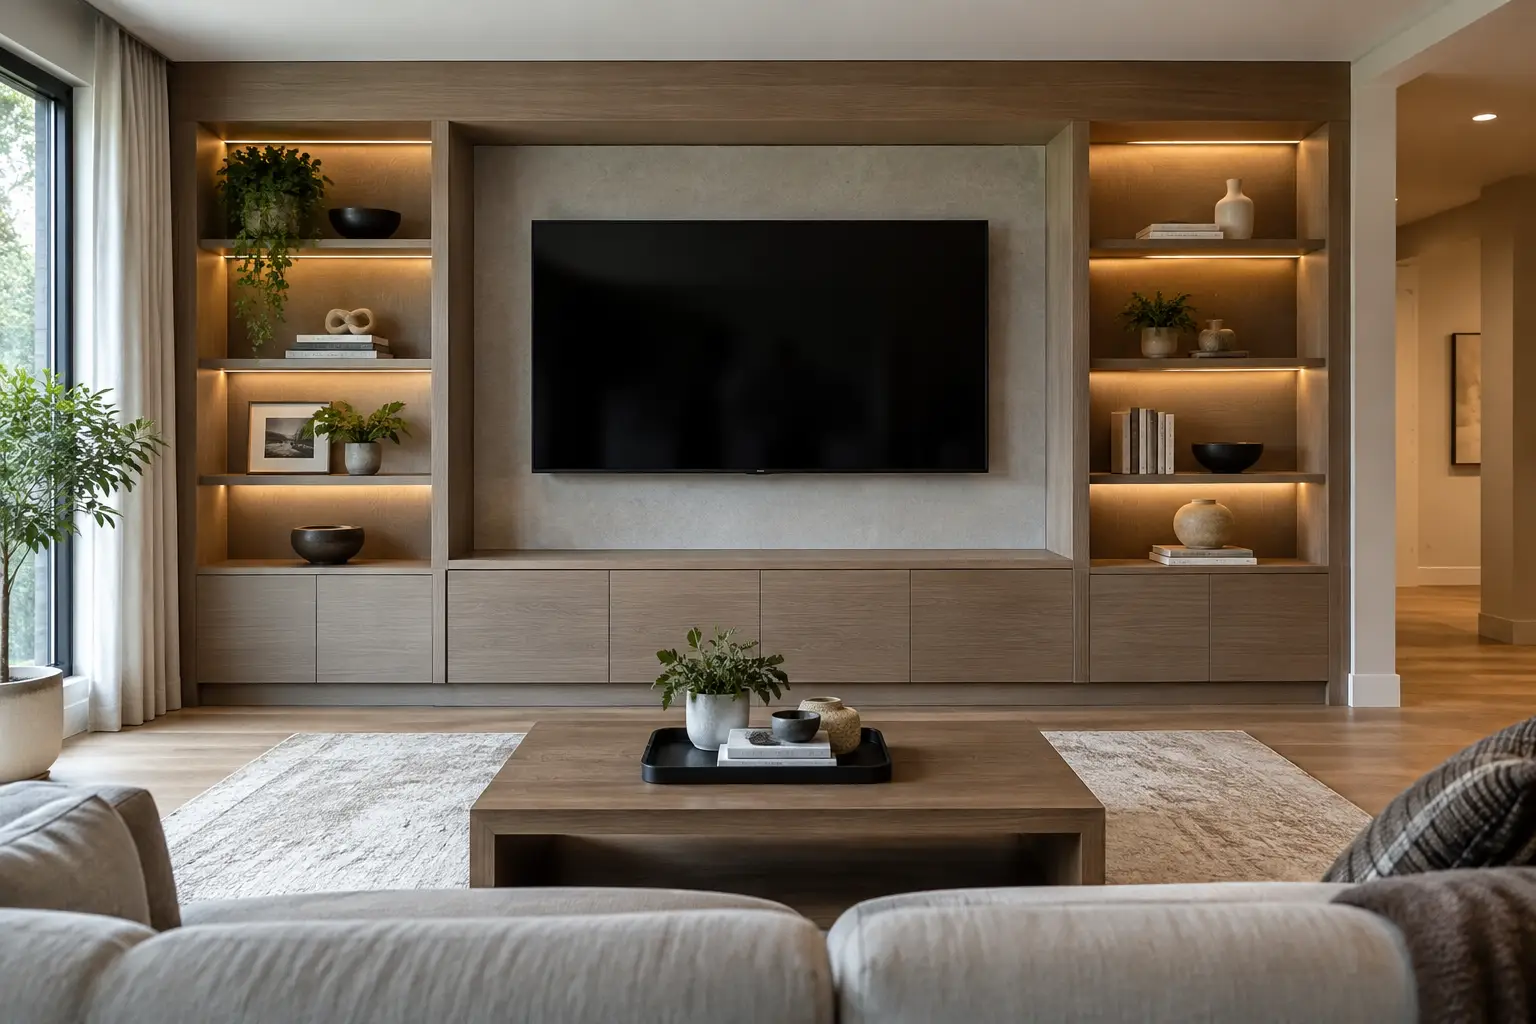
A media wall should do more than give the television a place to hang. It should make the room feel calmer, more intentional, and easier to live in. Knowing how to design a media wall starts with a shift in perspective: treat it as an architectural feature with a job to do, not a collection of shelves placed around a screen.
For Dallas-Fort Worth homeowners, a well-planned media wall can turn an underused living room, loft, or flex space into a refined gathering place. The best designs balance visual impact with practical details such as cable management, storage for everyday items, ventilation for equipment, and proportions that suit the room.
Start With How the Room Is Actually Used
Before selecting finishes or choosing a fireplace style, consider what happens in the room on an ordinary weeknight. Is it where your family watches movies, where children play games, where you host friends, or where you want a quieter place to read? A media wall that supports one purpose can look very different from one designed for all four.
A family room often benefits from closed lower storage for remotes, gaming accessories, blankets, and board games. A formal sitting room may call for fewer cabinets and more symmetry. In a multipurpose space, a mix of concealed storage and open display shelves creates flexibility without making the wall feel busy.
It also helps to identify what needs to disappear. Routers, speakers, cable boxes, charging cords, and consoles quickly undermine an otherwise polished design when they are left exposed. Planning for them early allows the finished wall to feel composed rather than improvised.
Establish the Right Size and Proportions
The television is usually the visual anchor, but it should not dictate every dimension. A screen that is too small can look lost on a broad wall; one that is too large can overwhelm the room and make comfortable viewing difficult.
Start with the viewing distance, then select a television size that fits both the seating arrangement and the wall. The center of the screen should generally sit close to seated eye level. When a fireplace is part of the design, this becomes more complicated. Mounting a television too high above a fireplace may create neck strain, even if the overall composition looks balanced.
The wall itself needs breathing room. Built-ins that extend from floor to ceiling can add presence in a room with generous height, while a lower cabinet composition may feel more appropriate beneath a vaulted ceiling or along a narrower wall. Aim for margins around the television rather than crowding it with cabinetry. Negative space is part of the design.
Use Symmetry Carefully
Symmetry is a reliable choice when you want a tailored, classic look. Matching cabinets or shelving towers on each side of a centered television create order and work particularly well in formal rooms.
But symmetry is not mandatory. An asymmetrical media wall can feel more current and relaxed, especially when one side includes tall storage and the other has open shelving or artwork. The key is visual balance. A tall cabinet on one side may need a substantial fireplace surround, wider base cabinet, or grouped shelves on the other to keep the wall from feeling lopsided.
Choose a Layout Before Choosing Finishes
Materials are exciting, but layout decisions determine whether a media wall works every day. Sketch the wall in simple blocks first: television zone, base cabinets, tall storage, shelving, fireplace, and any open wall space. This makes it easier to see where the composition feels heavy or where useful storage is missing.
A few layouts consistently work well:
- A centered television above a low run of closed cabinets suits rooms that need storage without a fully built-in appearance.
- A television framed by full-height cabinetry creates a custom furniture effect and provides substantial concealed storage.
- A fireplace and television centered within a panelled feature wall makes a strong focal point, provided the mounting height remains comfortable.
- An offset television paired with display shelves can soften the look in a casual lounge or multipurpose room.
The right option depends on wall width, ceiling height, room traffic, and what you need to store. A beautiful design that leaves no place for everyday clutter will not stay beautiful for long.
Plan Power, Cables, and Ventilation Early
The cleanest media walls hide their technical requirements, but they never ignore them. Plan dedicated power outlets behind the television and within cabinets where equipment will live. Include pathways for HDMI, Ethernet, speaker wire, and future upgrades. Technology changes faster than millwork, so accessible cable routes are a wise investment.
Ventilation matters when AV equipment is enclosed. Components produce heat, and tightly sealed cabinets can shorten their lifespan or affect performance. Ventilated panels, discreet grilles, and well-designed cabinet interiors solve this problem without compromising the finished look.
If you are incorporating a fireplace, follow the manufacturer’s clearance requirements and consult the appropriate qualified trades for electrical and installation work. The visual design should never come before safety, heat management, or local code requirements.
Build Storage Around Real Life
A media wall can reclaim valuable square footage when storage is designed with specific belongings in mind. Lower cabinets are ideal for items you use frequently but do not want on display. Deep drawers may work well for games and blankets, while adjustable shelves accommodate changing equipment and larger items.
Open shelving has a different role. It brings personality through books, ceramics, framed photography, and collected objects, but it requires restraint. A shelf filled edge to edge can make the entire wall look cluttered, particularly around a dark television screen. Leave open areas between objects and vary heights, textures, and shapes.
For many households, the strongest solution is a combination: closed cabinetry for the practical items, paired with a limited amount of open shelving for warmth and character. This approach gives the room a finished appearance without demanding constant styling.
Select Materials That Belong in the Room
A media wall should connect to the rest of the home rather than feel like a showroom display. Consider nearby flooring, cabinetry, trim, and furniture before selecting finishes. Warm wood tones can add softness to a room with stone or tile floors. Painted cabinetry can coordinate with existing millwork. Textured panels, slatted wood details, stone, or plaster-style finishes can create depth without relying on many separate decorative pieces.
There is a trade-off with every material. Dark finishes can feel sophisticated and make a television visually recede, but they may absorb light in a smaller room. Light finishes can make the wall feel airy, though they show more contrast around a black screen. Highly textured materials create drama but may compete with patterned furniture or busy artwork.
If the room already has several focal points, keep the media wall quieter. If the room is plain and needs identity, a more expressive material can give it a sense of place.
Add Lighting With Restraint
Lighting turns a media wall from useful to atmospheric. Integrated LED lighting inside shelves can highlight displayed objects, while soft backlighting behind panels adds depth in the evening. Dimmable lighting is especially useful because movie night and daytime entertaining call for different levels of brightness.
Avoid placing bright, direct light where it will reflect on the screen. The goal is a warm glow that supports the room, not lighting that competes with the television or creates visual noise.
Use a Design Process That Removes Guesswork
Custom media walls involve more decisions than most homeowners expect: dimensions, cabinet functions, hardware, finish samples, electrical locations, screen placement, lighting, and installation sequencing. A professional design process brings these choices together before construction begins.
At Orga Spaces, the planning process begins with how you want the room to function, then develops a tailored design that reflects your home and daily routine. A 3D presentation helps you assess proportions, storage capacity, and finish combinations before installation, so decisions feel considered rather than rushed.
A media wall earns its place when it makes the room easier to enjoy. Give it the storage your household needs, the proportions your space deserves, and enough visual calm to let the people in the room take center stage.