PROJECT SHOWCASE | BY ORGA SPACES
Project Overview
Introduction: Reclaiming the Garage
Welcome to another project showcase from Orga Spaces. Transforming a chaotic, cluttered garage into a pristine, highly functional extension of the home is what we do best. At Orga Spaces, we are a premier, full-service garage makeover service. We manage and execute the entire transformation from the initial design consultation to the final installation. Today, we are thrilled to walk you through a recent, comprehensive garage makeover in Irving, Texas.
This project involved a large three-car garage owned by a busy family. Like many families, their garage had slowly transitioned over the years, becoming a catch-all storage room rather than a place to park vehicles. The floor was crowded with moving boxes, sports equipment, gardening tools, and bicycles, leaving absolutely no room for their cars. They needed a serious intervention, and our team was ready to deliver a top-to-bottom makeover that would maximize their space, modernize their lighting, and create a highly durable, beautiful environment.
The Vision & Detailed 3D Design Process
Every successful transformation begins with a detailed consultation and a crystal-clear vision.
During our initial discussions with the client in Irving, the primary objectives were outlined explicitly: create intelligent, accessible storage space, clear the floor of all clutter, and ultimately reclaim the garage for its original purpose, parking cars.
Given that there are three children and two active adults in the household, the storage requirements were significant. We collaborated closely to agree on creating designated, purpose-built zones. This included a specialized wall-mounted area capable of securely holding five bicycles and gardening tools. The garage featured a standard flat ceiling with a significant amount of vertical space. We suggested installing some overhead racks to capitalize on this unused section dedicated entirely to large storage bins. Two other workspaces were also included with heavy-duty cabinets with wooden worktops.
To ensure the client could fully visualize the potential of their space, we took precise measurements of the entire garage and generated a comprehensive 3D layout of the proposed setup. This digital model allowed the family to see exactly how the new zones would interact, how the aesthetic would look, and how the overall traffic flow would improve.
We also asked the client if they would like a floor coating added to the garage renovation project. Initially, the client was hesitant, expressing concern about how they would manage their belongings and where they would store their items during such an extensive renovation process.
“We understood this logistical challenge perfectly. To make the process seamless, we explained that if they moved forward with the complete package, including our premium floor coating, we would provide a complimentary, large storage container parked right in their driveway for the duration of the project.”
This full-service approach provided the exact peace of mind they needed. The client enthusiastically agreed to the plan and subsequently added a few more crucial requests to the scope of work: a fresh coat of paint for the entire garage, the replacement of an old, stained utility sink, and the upgrading of their dim, outdated ceiling lights. With all elements finalized, we updated the 3D design, received the client’s enthusiastic approval on both the layout and the quote, and locked in our project start date.
Pre-Construction: Seamless Logistics
True to our commitment to a stress-free, full-service experience, our team arrived two days before the scheduled start date to drop off the complimentary large storage trailer. We parked it conveniently in the client’s driveway, directly in front of the garage. This allowed the family ample time to empty the garage at their own pace, securely storing their bins, bikes, and tools without having to rent off-site storage or clutter their living room. With the space entirely cleared, the real work could begin.
Days 1 & 2: Preparation, Repairs, and Painting
The first phase of the physical makeover was dedicated entirely to preparation and painting. A high quality, lasting finish requires meticulous prep work, and our crew never cuts corners.
On Day One, we focused heavily on the walls and the ceiling. The drywall had suffered over the years, accumulating various dents, dings, and several larger holes from previous shelving units and minor mishaps. We carefully patched, sanded, and smoothed every single imperfection. We also removed a damaged section of baseboard, tore out the old, grimy utility sink, and dismantled the existing, dilapidated workbench attached to the wall. Once the structural repairs were seamless, we applied a fresh, bright coat of paint to the ceiling, instantly making the entire space feel larger and substantially cleaner.
Day Two, we proceeded to paint all the garage walls, establishing a crisp, modern backdrop for the new cabinets. We finished the day by painting the door and window trim, as well as giving a fresh coat to one side of the two entry doors leading into the home.
Days 3 & 4: Premium Floor Coating Application
With the walls looking immaculate, Days Three and Four were dedicated to the foundation of the space: the floor. Our concrete coating process is industrial-grade and explicitly designed to withstand heavy vehicle traffic, chemical spills, and the daily rigors of an active family.
On the first day of the flooring phase (Day Three of the project), we began by mechanically grinding down the entire concrete floor surface. This crucial step opens the pores of the concrete, ensuring maximum adhesion for our base coat. We also addressed the two steps leading into the house, tearing off the old, worn carpeting and securely cladding them in highly durable cement boards.
Every crack, pit, and concrete imperfection across the floor was meticulously filled and leveled to create a flawless, seamless canvas.
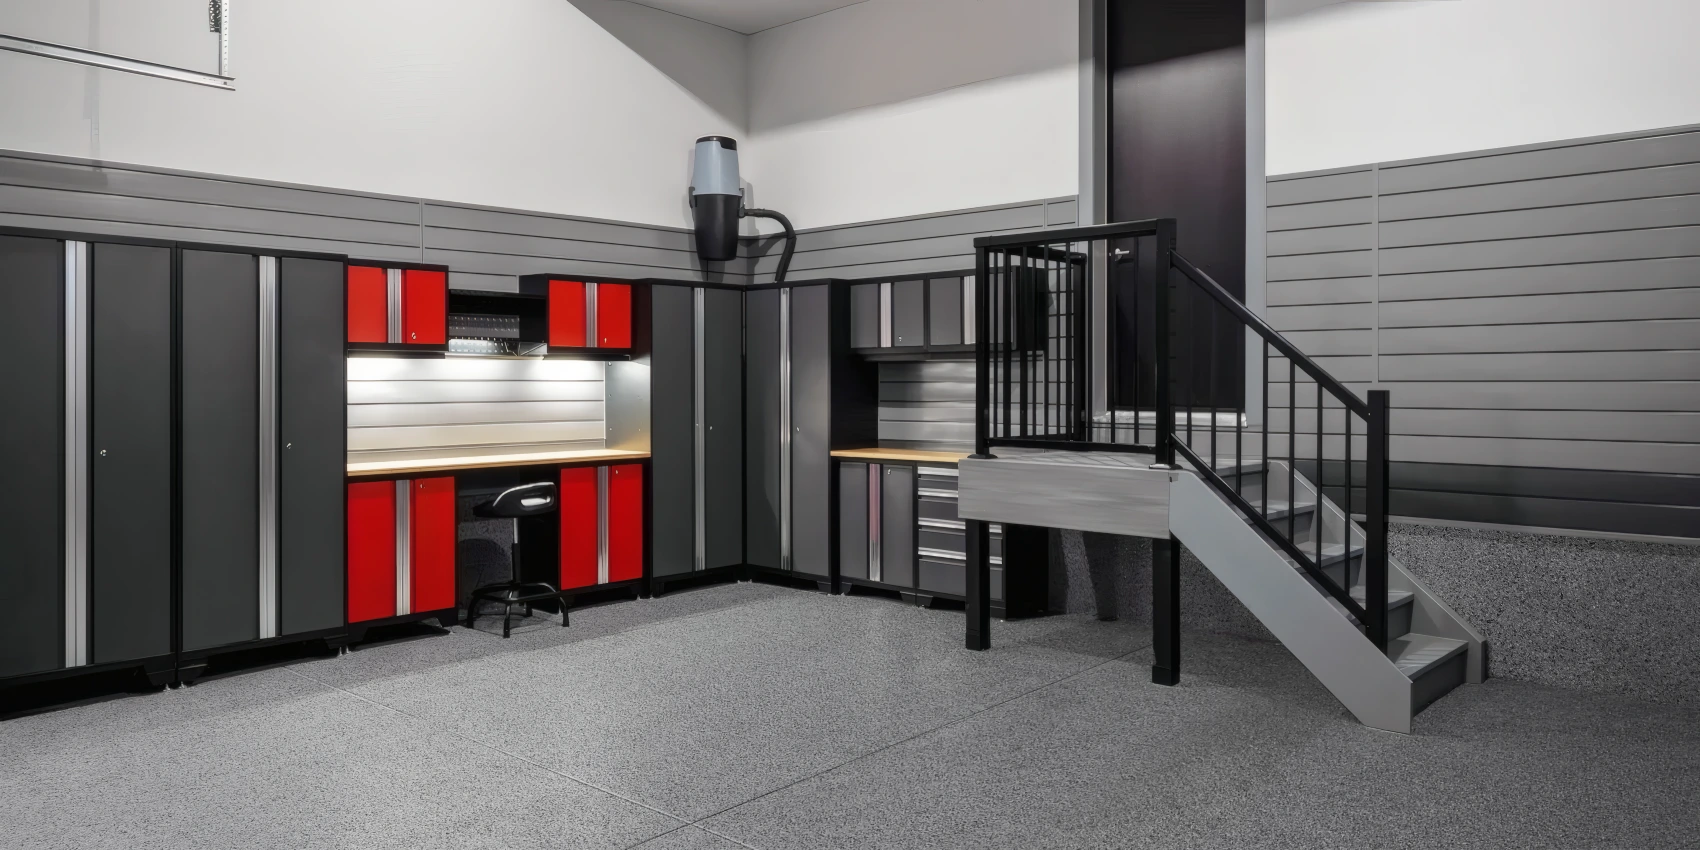
Returning the following morning on Day Four, we applied the first coat of our high-adhesion primer. As the base layer settled, we broadcasted the client’s chosen color profile, a beautiful, textured flake blend called “Gravel”, across the entire floor, the exposed concrete sidewalls, and the newly clad steps. Once the flake layer was set and the excess was recovered, we applied the final, critical layer: a high-performance clear sealer. This topcoat provides unparalleled protection, featuring UV resistance so it won’t yellow over time, anti-slip properties for family safety, and extreme scratch resistance.
Day 5: Crucial Curing Time
Patience is a key component of quality craftsmanship. No physical work was performed on Day Five. The garage was locked down and left entirely alone to allow the new floor coating to cure properly and achieve its maximum structural hardness. This vital resting period ensures that the heavy cabinets and parked vehicles will not compromise or indent the integrity of the finish.
Days 6 & 7: Smart Installations and Ultimate Organization
The final two days were the most exciting, as the initial 3D design finally came to life in the physical space. Over Days Six and Seven, we tackled the installation of the smart lighting, the wall storage systems, and the heavy-duty cabinetry.
We started by completely modernizing the illumination. The client’s old, dim bulbs were removed and replaced with ultra-powerful, energy-efficient lighting fixtures pushing an impressive 12,000 lumens. These aren’t just bright lights; they are “smart” fixtures equipped with integrated Bluetooth speakers. Now, the client can connect their phone directly to the ceiling lights and stream their favorite music or podcasts, creating an incredibly pleasant and dynamic atmosphere while working on projects in the garage.
Next, we installed the heavy-duty slatwall panels across the designated storage zones, outfitting them with specialized hooks to securely hold the family’s five bicycles and their entire array of gardening tools. The overhead racks were also securely mounted to the ceiling joints, providing massive, out-of-the-way storage for seasonal items and the large bins the client had safely stored in the trailer.
On the final day, the centerpiece of the workspace was assembled. We installed three tall, commercial-grade steel cabinets. These lockable units are perfect for items that require secure, out-of-reach storage, such as dangerous power tools, chemicals, and paint. We then flanked the area with the remaining matching cabinets with a beautiful, thick wooden worktop, giving the adults a dedicated, durable area for weekend projects, crafts, and mechanical repairs.
The Final Result: A Masterpiece of Functionality
The transformation of this Irving, Texas garage is a powerful testament to what a comprehensive, full-service makeover can achieve. What was once a stressful, cluttered, and dusty room is now a bright, clean, and highly organized extension of the home.
The family now has dedicated, easy-to-access space, a beautiful and nearly indestructible floor, smart lighting that doubles as an entertainment system, and, most importantly, plenty of room to easily and comfortably park their cars. At Orga Spaces, we take immense pride in handling every single detail of the project, from the initial 3D design to the final project. This garage is now fully ready for proper, efficient, and highly enjoyable use for many years to come.
Ready to start your transformation? Contact the design experts at Orga Spaces today, and let us bring your dream garage to life! Request a free consultation!