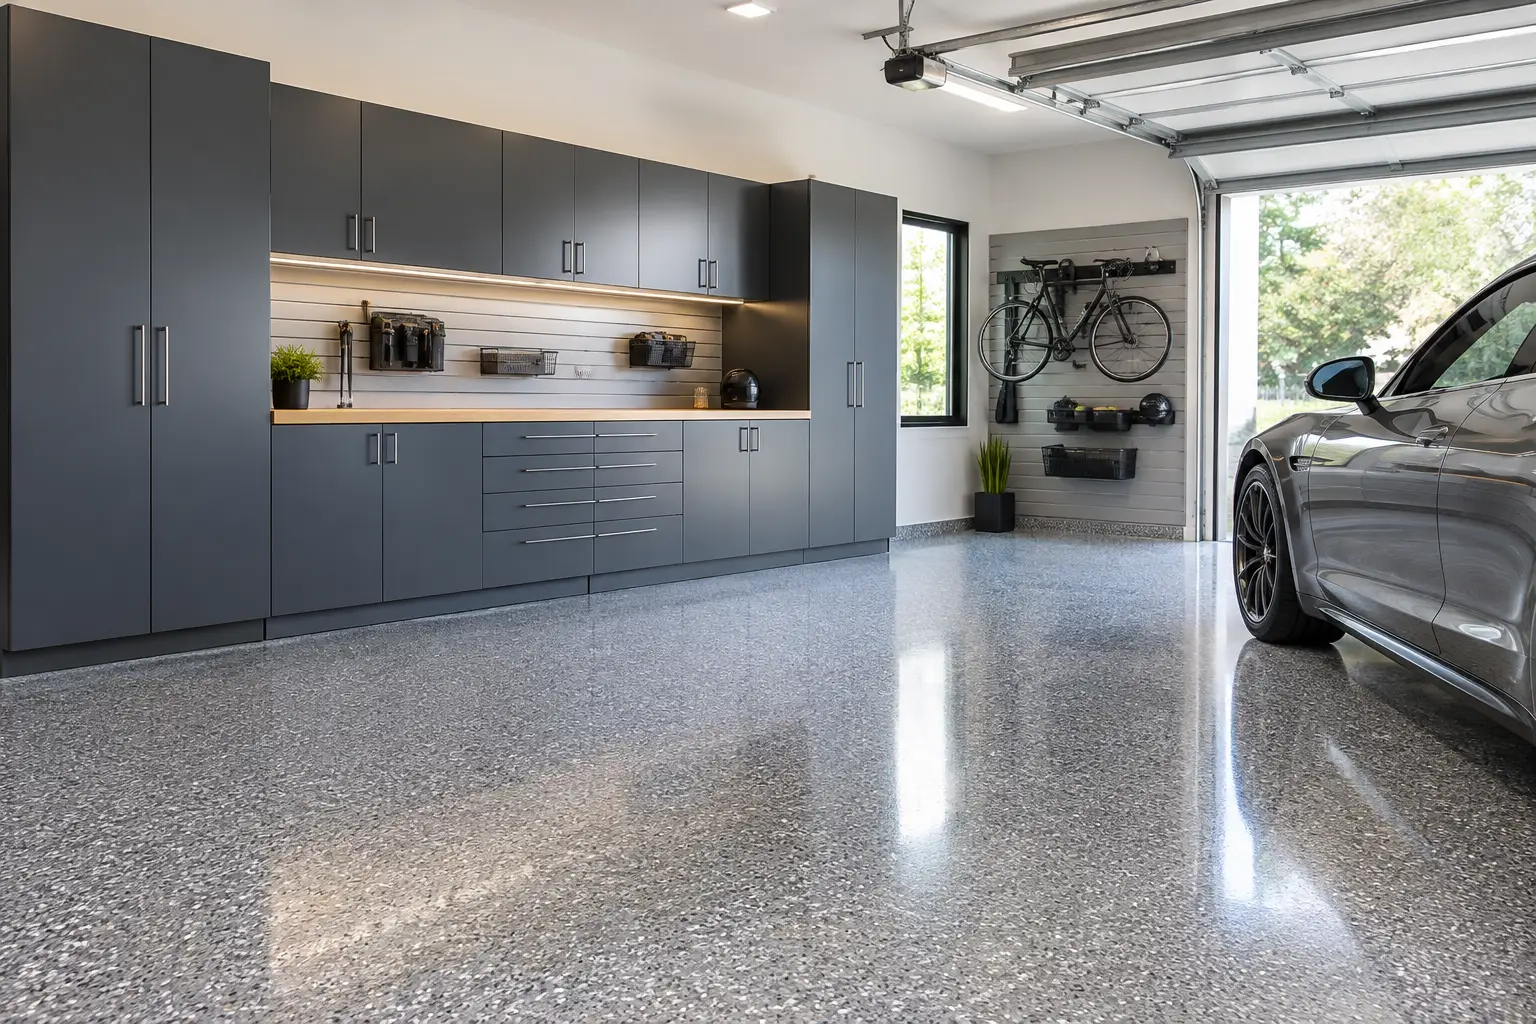
A garage can have beautiful cabinets, organized wall storage, and room for every tool, yet still feel unfinished when the concrete floor is stained, dusty, or cracked. This garage floor coating project example shows how the right flooring system changes the entire experience of the space, creating a foundation that looks intentional, performs under pressure, and makes daily routines easier.
The project began with a familiar situation: a busy family garage used for parking, weekend projects, sports equipment, and seasonal storage. The concrete had absorbed years of tire marks and spills. A few visible cracks ran across the surface, and the unfinished gray slab made the room feel darker than it needed to be. The homeowners did not simply want to cover a problem. They wanted the garage to feel like a considered extension of their home.
The Vision Behind This Garage Floor Coating Project Example
The homeowners were planning a full garage transformation, including custom steel cabinets and better storage zones. Flooring needed to support that larger vision. It had to be durable enough for vehicles and household chemicals, easy to clean after muddy days, and polished enough to complement a refined storage system.
A coating is often treated as a practical afterthought. In a well-designed garage, it is the visual base layer that brings cabinets, wall storage, and open floor space together. It can make a compact garage feel brighter and more expansive, while helping a larger garage feel orderly rather than industrial.
For this project, the homeowners selected a neutral, multi-tone vinyl flake blend. The colour variation helped soften the appearance of dust and everyday debris between cleanings, while giving the floor a tailored, stone-like character. This is one reason full-flake systems are so effective: they deliver dimension and visual texture without asking homeowners to sacrifice performance.
Why the Existing Concrete Needed More Than a Quick Coating
Concrete floors can look solid while hiding conditions that affect adhesion. Oil residue, old sealers, smooth trowelled surfaces, moisture concerns, and hairline cracks all need to be evaluated before a new coating is applied. Skipping proper preparation can lead to peeling, weak bonding, or an uneven finish that disappoints far sooner than it should.
In this case, the slab was structurally sound, but it had accumulated surface contaminants and showed minor cracking near the vehicle parking area. A paint-on product from a hardware store might have made the floor look better temporarily, but it would not have addressed the preparation required for long-term performance.
Professional installation begins by treating the concrete as the foundation of the project, not just the surface beneath it. The goal is a floor that can handle real life: hot tires, dropped tools, tracked-in dirt, cleaning products, and the daily movement that comes with an active household.
The Installation Process, From Concrete to Finished Floor
This project used a polyaspartic full-flake coating system installed directly over the existing concrete. Compared with conventional epoxy systems, polyaspartic coatings offer a stronger fit for homeowners who want UV stability, chemical resistance, and a finish that will not yellow or crack under normal garage use.
The first step was diamond grinding. This mechanical process opens the pores of the concrete and removes surface material, creating the profile needed for the coating to bond properly. It is a critical stage because a beautiful topcoat cannot compensate for inadequate preparation below it.
Next, the installation team repaired the visible cracks. Crack repair helps create a more consistent finished appearance and protects the integrity of the coating system. While repaired areas may retain slight visual variation depending on the slab and crack movement, professional preparation keeps them from distracting from the overall design.
A polyurea primer and base coat were then applied. While the base coat was still active, vinyl flakes were broadcast across the entire floor until the surface reached full coverage. This is different from a light decorative sprinkle. Full flake coverage creates a more uniform, substantial finish with colour and texture present across the entire surface.
After the coating had cured appropriately, excess flakes were removed and the floor was sealed with a clear polyaspartic top coat. The finished surface was smooth enough to clean easily, yet slip-resistant for more confident movement in a working garage. The system can typically be installed in one day, which is particularly valuable for homeowners who do not want a renovation to disrupt their household for a week.
What Changed Once the Floor Was Complete
The finished garage immediately felt brighter and more composed. The neutral flake blend reflected light more effectively than bare gray concrete, while the consistent surface created a clean backdrop for the cabinetry planned along the side wall.
Functionally, the floor became easier to live with. Spills could be wiped up rather than absorbed. Dust no longer collected in the same porous way it had on unfinished concrete. Tire marks and routine messes became manageable maintenance tasks rather than permanent reminders of a busy household.
The most meaningful change, however, was how the space felt. Instead of an area where clutter and unfinished surfaces naturally accumulated, the garage became a room with clear purpose. The family could park, access equipment, and start a weekend project without the visual friction of stained concrete underfoot.
Choosing the Right Finish for Your Garage
There is no single flake colour that suits every home. A lighter blend can brighten a darker garage and create a crisp, contemporary look. Medium blends are often practical for active households because they conceal minor debris well. Darker palettes can feel dramatic and grounded, though they may show dust more readily in garages with strong natural light.
The best choice depends on surrounding finishes, cabinet colour, lighting, and how the garage is used. A homeowner who wants a sleek showroom-style garage may prioritize a cooler palette with subtle contrast. A family using the room as an entry point, storage area, and workshop may prefer a warmer, more forgiving blend.
It also helps to think beyond colour. Full-flake polyaspartic flooring is an investment in the performance of the room. For a garage that only stores a vehicle occasionally, a simpler solution may be sufficient. For a garage that supports everyday arrivals, hobbies, storage, and a premium organization system, a professionally prepared coating offers greater durability and a more complete transformation.
A Floor That Supports the Whole Garage Design
Flooring works best when it is planned alongside the rest of the garage, not selected in isolation. Cabinet layouts influence where vehicles park, where tools are used, and where bulky items are stored. Wall and overhead storage affect traffic flow. A well-designed floor should support these decisions while giving the room a cohesive visual finish.
At Orga Spaces, a garage transformation is designed around the way each household actually lives. The process begins with understanding what needs to be stored, how the space needs to function, and what level of refinement feels right for the home. A 3D design presentation helps homeowners see how flooring, storage, and cabinetry can work together before installation begins.
A garage floor coating does not need to be flashy to make a major difference. When it is properly prepared, thoughtfully coloured, and paired with a plan for the rest of the room, it creates room for you to breathe the moment you pull in. The best time to consider it is before the garage is filled again, while there is still an opportunity to build a space that supports the life happening around it.